

How to Tell When Exterior Paint Is Starting to Fail
You’ve noticed something on your siding that doesn’t look quite right anymore. Maybe it’s a dull patch, a hairline crack near a window, or a spot that feels chalky when you run your hand across it. The real question is whether you’re looking at normal wear or the start of something bigger. That’s what this guide covers: how to tell when exterior paint is starting to fail, before it turns into a much bigger repair.
Paint failure rarely shows up all at once. It moves through stages, and each stage is easier to fix than the one after it. By the time peeling becomes obvious, you’ve usually already missed several earlier warning signs that would have cost far less to address.
Here’s what you’ll learn: why exterior paint breaks down in the first place, what the earliest signs look like, how those signs escalate, and what it means once your paint has visibly failed.
The Real Reason Exterior Paint Breaks Down Over Time
Exterior paint is a protective film. Its job is to shield your siding, trim, and fascia from UV rays, moisture, and constant temperature swings. Every one of those forces works against the paint’s bond to the surface underneath, and that bond weakens a little more each year.
In the Chicago suburbs, freeze-thaw cycling speeds this process up more than it would in a milder climate. Paint expands and contracts right along with your siding as temperatures swing from summer highs in the 90s down to well below freezing in winter, and repeated cycles stress that flexibility until the film cracks or loses adhesion. Schaumburg homes typically go through dozens of freeze-thaw cycles every winter, and each one asks a little more of a paint film that’s already aging. Our post on how spring weather affects exterior house painting covers this same freeze-thaw stress in more depth, and it’s exactly what wears down paint that’s already been on the wall for a few seasons.
Failure doesn’t wear evenly across your home. It concentrates in specific spots:
- Trim edges and window and door seams, where two materials meet and movement is highest
- Sun-exposed elevations, especially south- and west-facing walls
- Fascia boards and other areas close to gutters, where moisture exposure runs highest
Understanding this mechanism is what makes the specific signs below make sense, rather than reading like a random checklist.
The Early Signs That Tell You Exterior Paint Is Starting to Fail
Failure typically starts subtly, well before anything looks obviously wrong. The two earliest indicators are chalking and fading.
Chalking and Powdery Residue
Chalking leaves a fine, powdery residue that rubs off on your hand when you touch the surface. It’s one of the earliest and most overlooked signs that paint is breaking down. UV exposure breaks down the paint’s binders and releases pigment particles at the surface, which often just reads as a slightly duller color rather than anything alarming.
A simple way to check is to run a dark cloth firmly across a section of siding in a shaded spot. A light dusting of color on the cloth is normal as paint ages. A heavy, chalky coating that leaves your hand visibly discolored signals the paint film has broken down more significantly and needs attention soon.
Many homeowners assume chalking is just dirt or pollen and wash it away without registering what it means. Catching chalking early is the cheapest point to act. It usually means a surface needs attention, not that paint has failed completely.
Fading and Uneven Color
Fading shows up as dullness or as color that no longer matches evenly across your house, especially on south- and west-facing walls. Those elevations take the most direct sun exposure during the day, so UV breakdown of pigment happens faster there than on shaded sides.
A useful comparison is checking a protected area, like siding behind a shutter or downspout, against the exposed sections nearby. If the protected spot looks noticeably richer or darker, that gap tells you how much color the exposed paint has already lost. Darker colors tend to show this gap fastest, since they absorb more UV energy than lighter shades.
Fading isn’t purely cosmetic. Paint that’s fading has already lost some of the protective density it started with. Uneven fading is often the first visual clue that tells you which side of your house is aging fastest.
The Signs That Paint Failure Is Progressing
Once chalking and fading go unaddressed, paint moves into a more visible, structurally relevant stage: cracking and blistering.
Hairline Cracking Along Seams and Trim
Hairline cracks are thin fracture lines that show up first at trim boards, window and door seams, and joints where two materials meet. These are the highest-movement points on your house, where wood expands and contracts the most and where caulk and paint have to flex the hardest.
Look closely at the corners of window and door trim and along horizontal seams where siding overlaps. A single straight crack usually points to a caulk joint that’s separated. A cluster of fine cracks branching in different directions, sometimes called alligatoring, usually means the paint film itself has become brittle with age rather than one localized failure point.
A small crack can look like nothing to worry about, but it’s an entry point, not a dead end. It widens with every freeze-thaw cycle. Once water gets behind paint through a crack, it starts working on the wood underneath, and that’s a different, more expensive repair than repainting alone.
Blistering and Bubbling
Blisters are raised bubbles in the paint film caused by trapped moisture or heat. This is a different problem than cracking, since it points to an adhesion failure rather than a flexibility failure. Moisture inside the wall or siding tries to escape through the paint film and gets trapped, or the paint never bonded properly to begin with. Our guide on how to prevent and fix paint bubbling walks through the same underlying causes in more detail.
Pressing gently on a blister tells you something useful. A hard, firm bubble usually points to an application issue, like paint applied over a surface that wasn’t fully clean or cured. A soft bubble that gives easily under light pressure often means active moisture is still trapped underneath, and that source needs to be found before any repainting happens.
The blister itself is a symptom. It always points to a moisture source that needs identifying before repainting solves anything. Once a blister pops, it leaves bare, exposed material behind, and that spot becomes the next place paint fails completely.
Peeling: The Sign Your Exterior Paint Has Already Failed
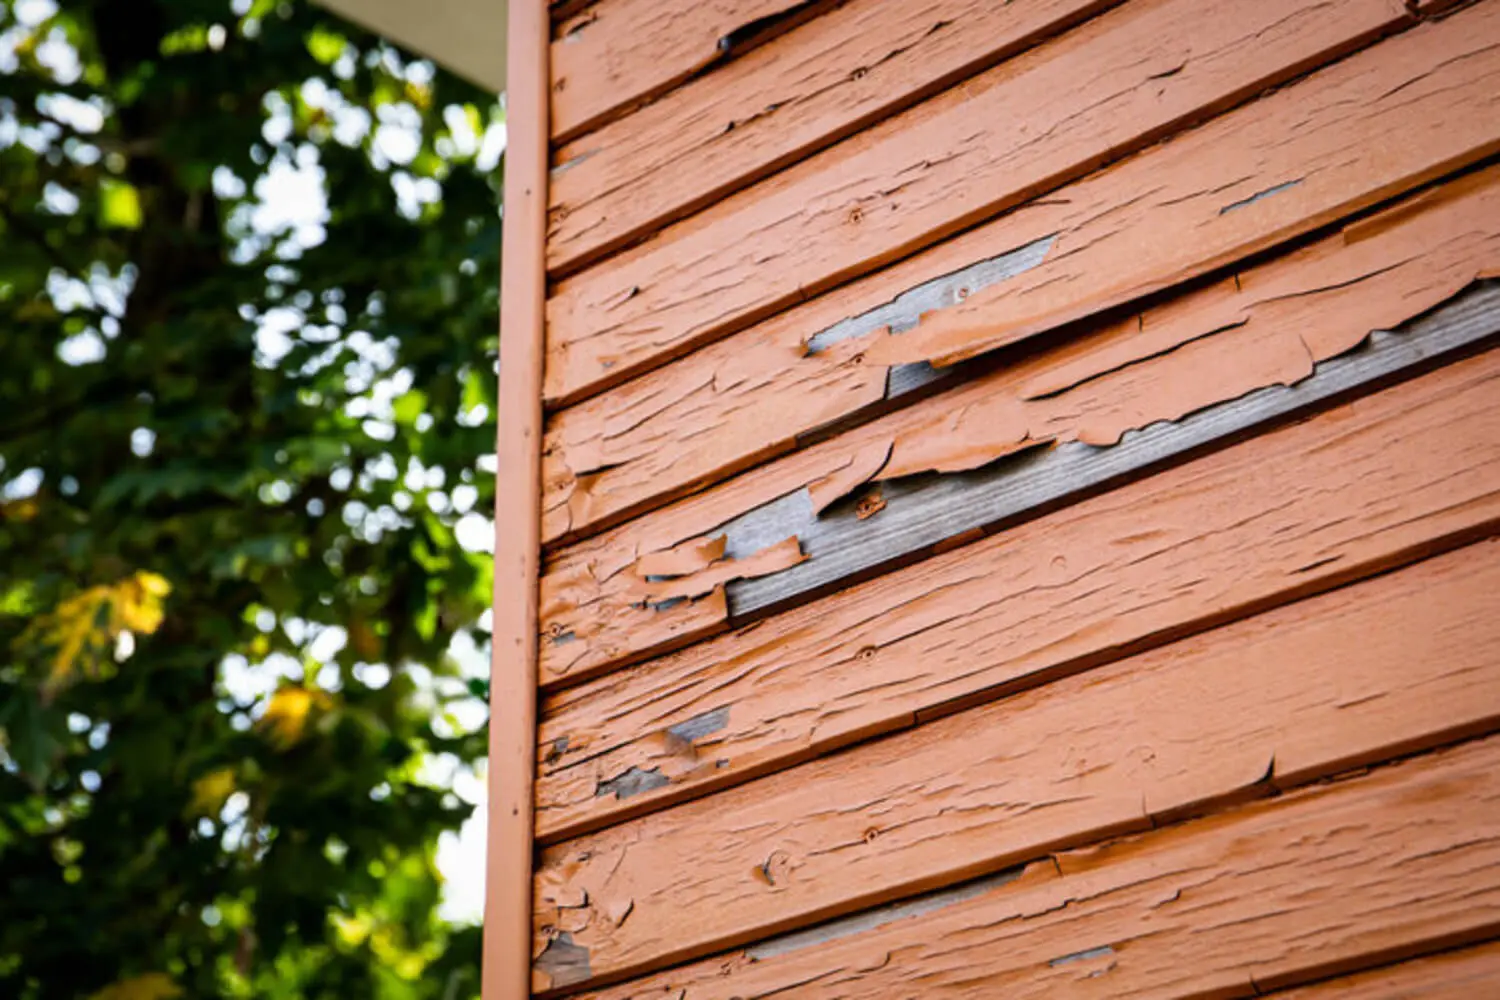
Peeling is the visible end stage. Sheets or flakes of paint separate entirely from the surface, and by the time this appears, moisture has already been working underneath for a while. Peeling happens after cracking and blistering go unaddressed long enough that adhesion fails completely across a section. It isn’t an isolated event.
Peeling often looks worse than it actually is structurally, and some homeowners wait to see how far it spreads. But peeling exposes bare wood immediately, and that wood starts absorbing moisture the moment it’s exposed. In a humid Midwest summer or through a full freeze-thaw winter, exposed wood can begin softening within a single season, especially at fascia boards and other spots that already collect the most moisture. A thorough inspection, similar to what our ultimate checklist for preparing a home for exterior painting walks through, can tell you exactly how far the damage has spread before you commit to a repaint.
The difference between acting at the chalking stage and acting at the peeling stage is often the difference between a straightforward repaint and one that now includes wood repair or replacement.
The Payoff of Catching Exterior Paint Failure Early
Exterior paint failure moves through stages: chalking and fading, then cracking and blistering, then peeling. Each stage costs less to address than the one after it. Whatever stage your home is showing right now is the cheapest it will ever be to fix from this point forward.
A quick yearly check, ideally once winter has passed and before the summer sun sets in, makes it much easier to catch these signs while they’re still cheap to fix. It only takes a few minutes to walk your exterior and check the trim, seams, and sun-exposed walls covered above.
The smartest next step is a straightforward inspection, not a commitment to a full repaint on the spot. A closer look at your exterior painting options can tell you exactly what stage your paint is at and what it would take to address it.
We’ve worked with homeowners across Schaumburg and the surrounding suburbs who caught these signs at every stage, from early chalking to full peeling, and we can tell you honestly what your home needs before you spend a dollar. If you’re ready to find out where your paint stands, contact us for a free estimate.